
Now that we've finished our PCB, let's get it fabricated.
#Export fabrication outputs
-
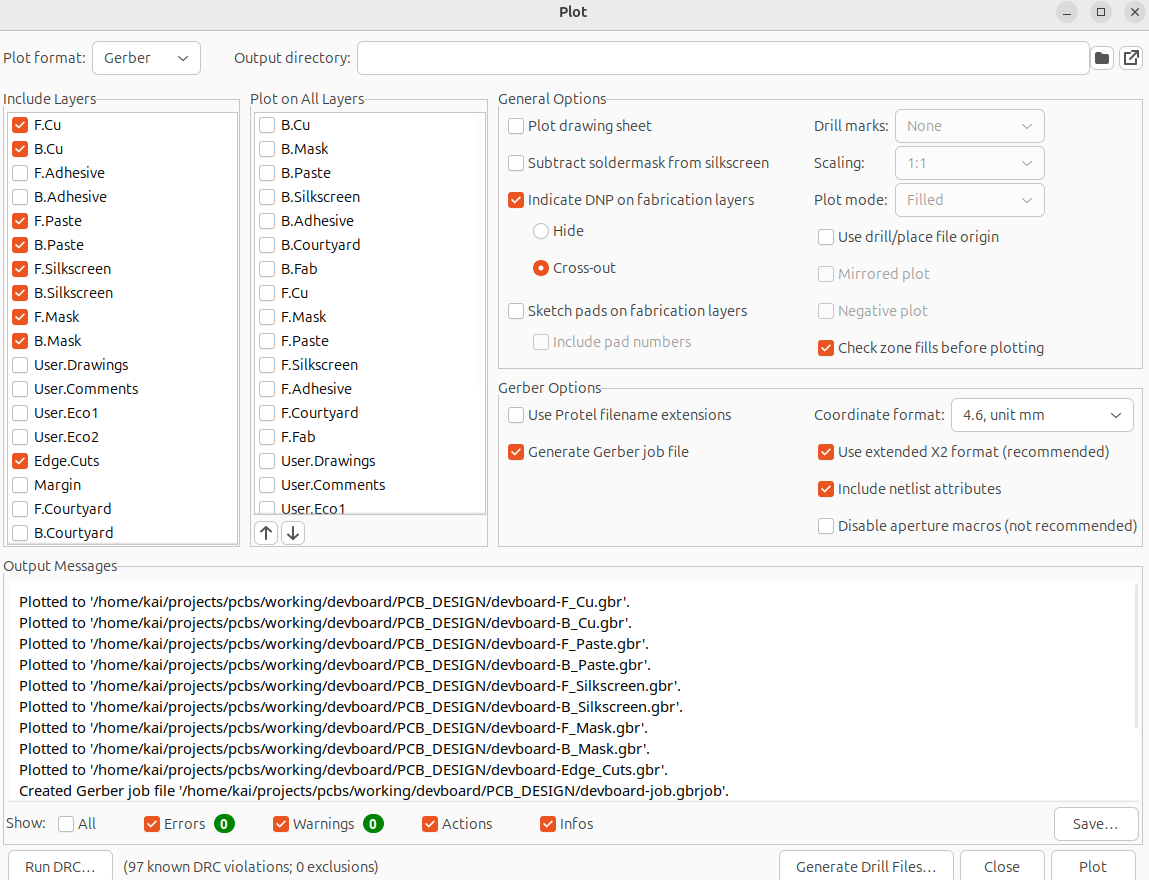
Save your PCB, and then go to File → Fabrication Outputs and then export every single thing there, if you want my gerber settings, here they are:
-
Now you can also use the KiCad fabrication toolkit to do this all for you if you're having problems, but I like to teach the whole process
#Fixing up the CPL and BOM
#Rename the CPL headers
-
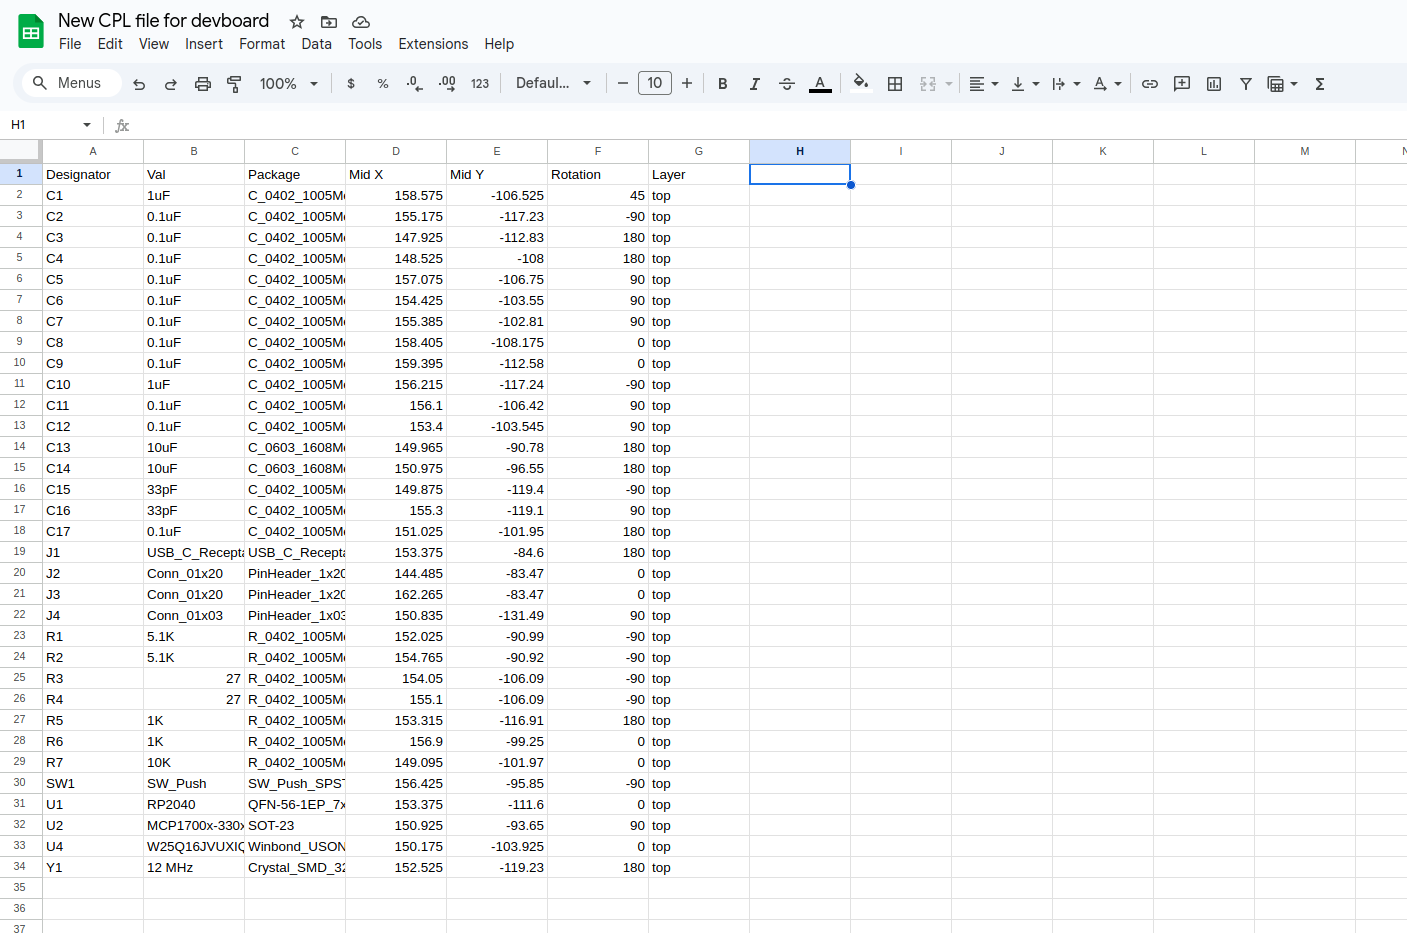
Before you turn all these files into a zip, you'll want to modify the CPL file, because JLCPCB expects the CPL file headers to be called something else, so add it into google sheets. This file will be called something like "your-project-top-pos.csv", we're doing one sided assembly so you can delete the bottom file. Anyways change the headers from:
- Ref → Designator
- PosX → Mid X
- PosY → Mid Y
- Rot → Rotation
- Side → Layer
#Rename the BOM header
-
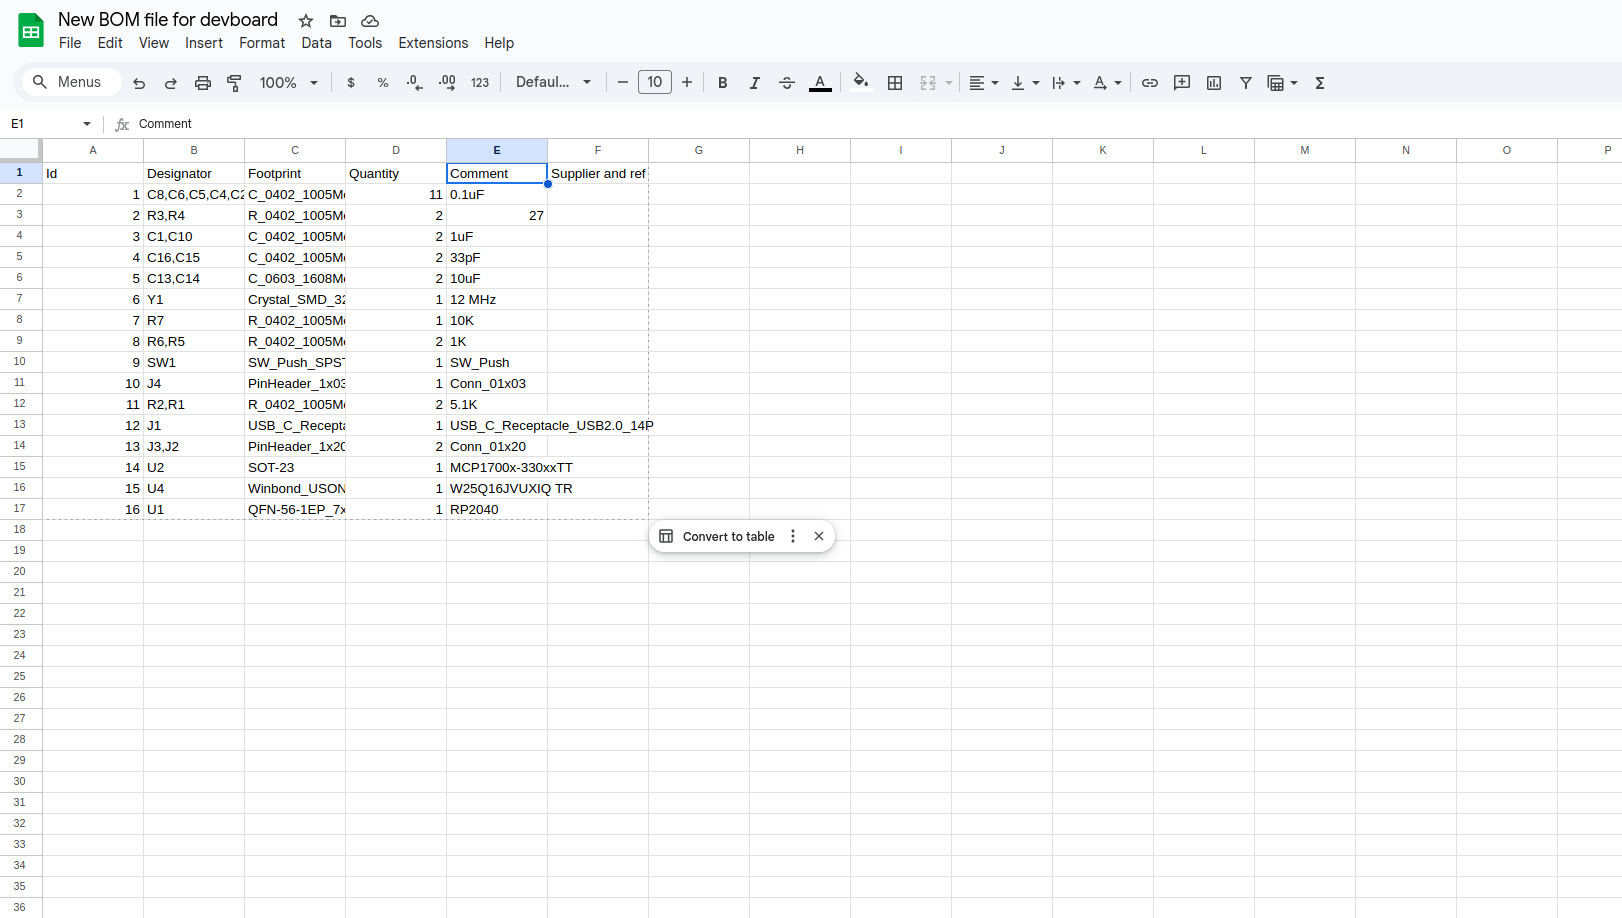
Next, you need to replace the headers on your BOM file, this is just changing Designation → Comment
#Zip everything up
-
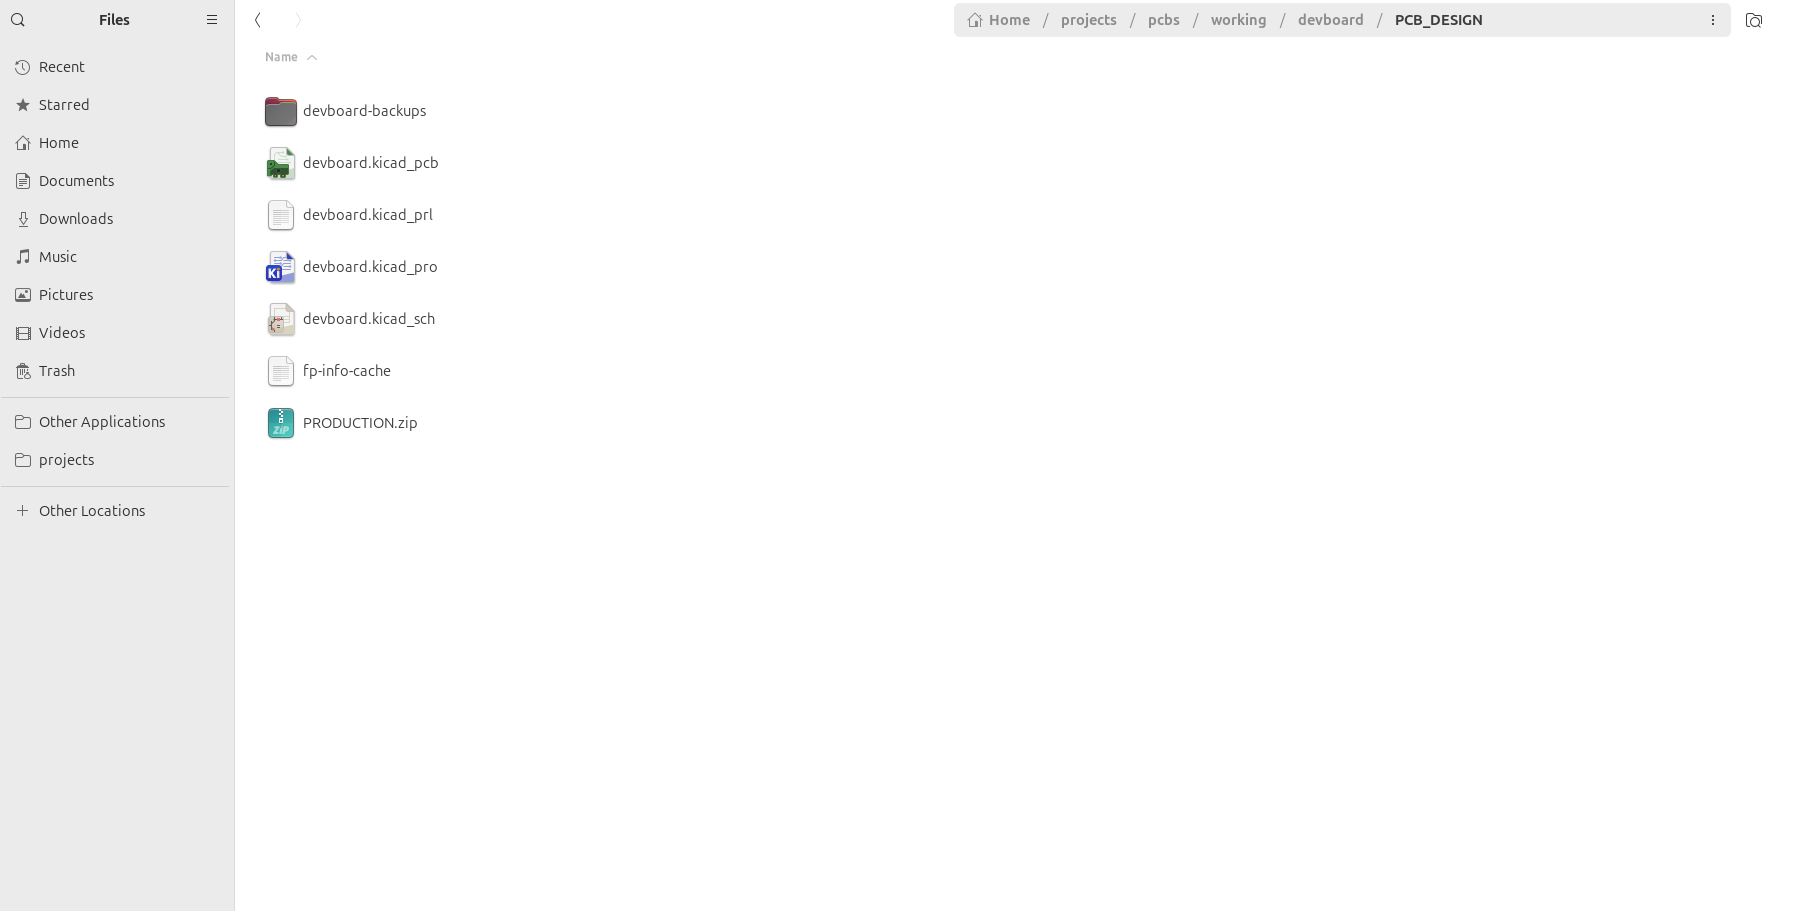
Once you've renamed those headers exactly, export is as a .csv and replace your old CPL/BOM file with this one. And then take all of the files you exported, and compress them into a zip folder, called "PRODUCTION" or whatever you want really:
-
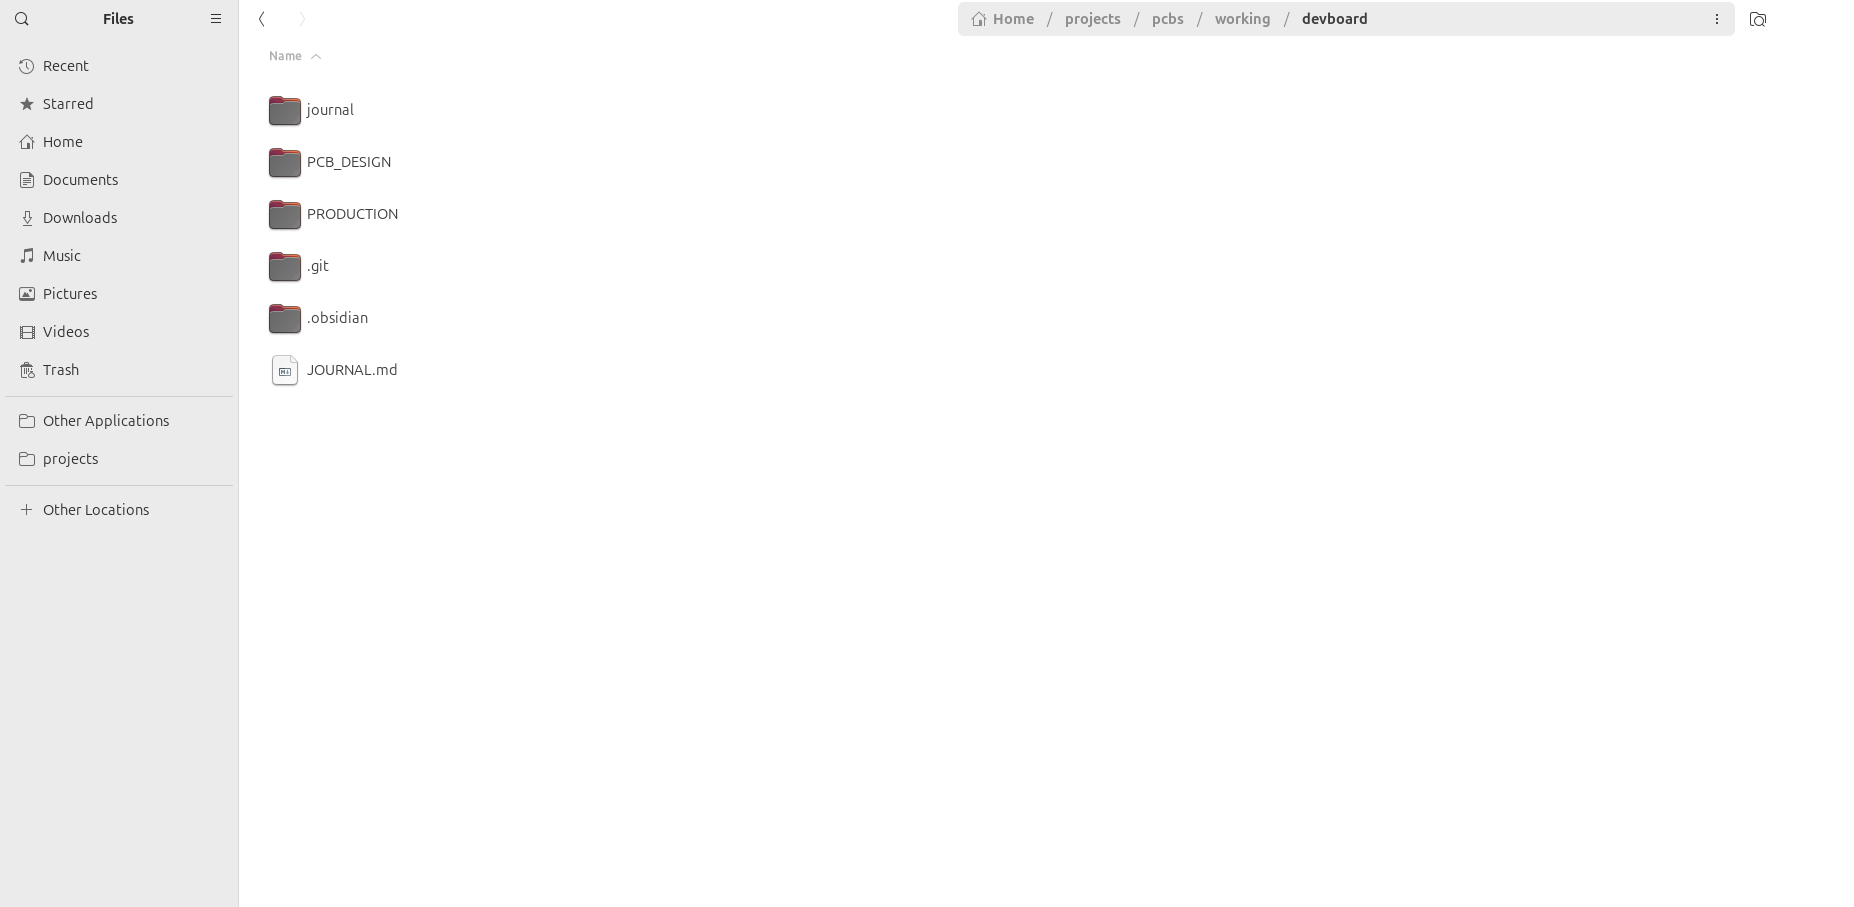
And now I usually make another folder called production in my root, and put this zip file inside of there:
#Ordering from JLCPCB
#Upload the zip and enable PCBA
-
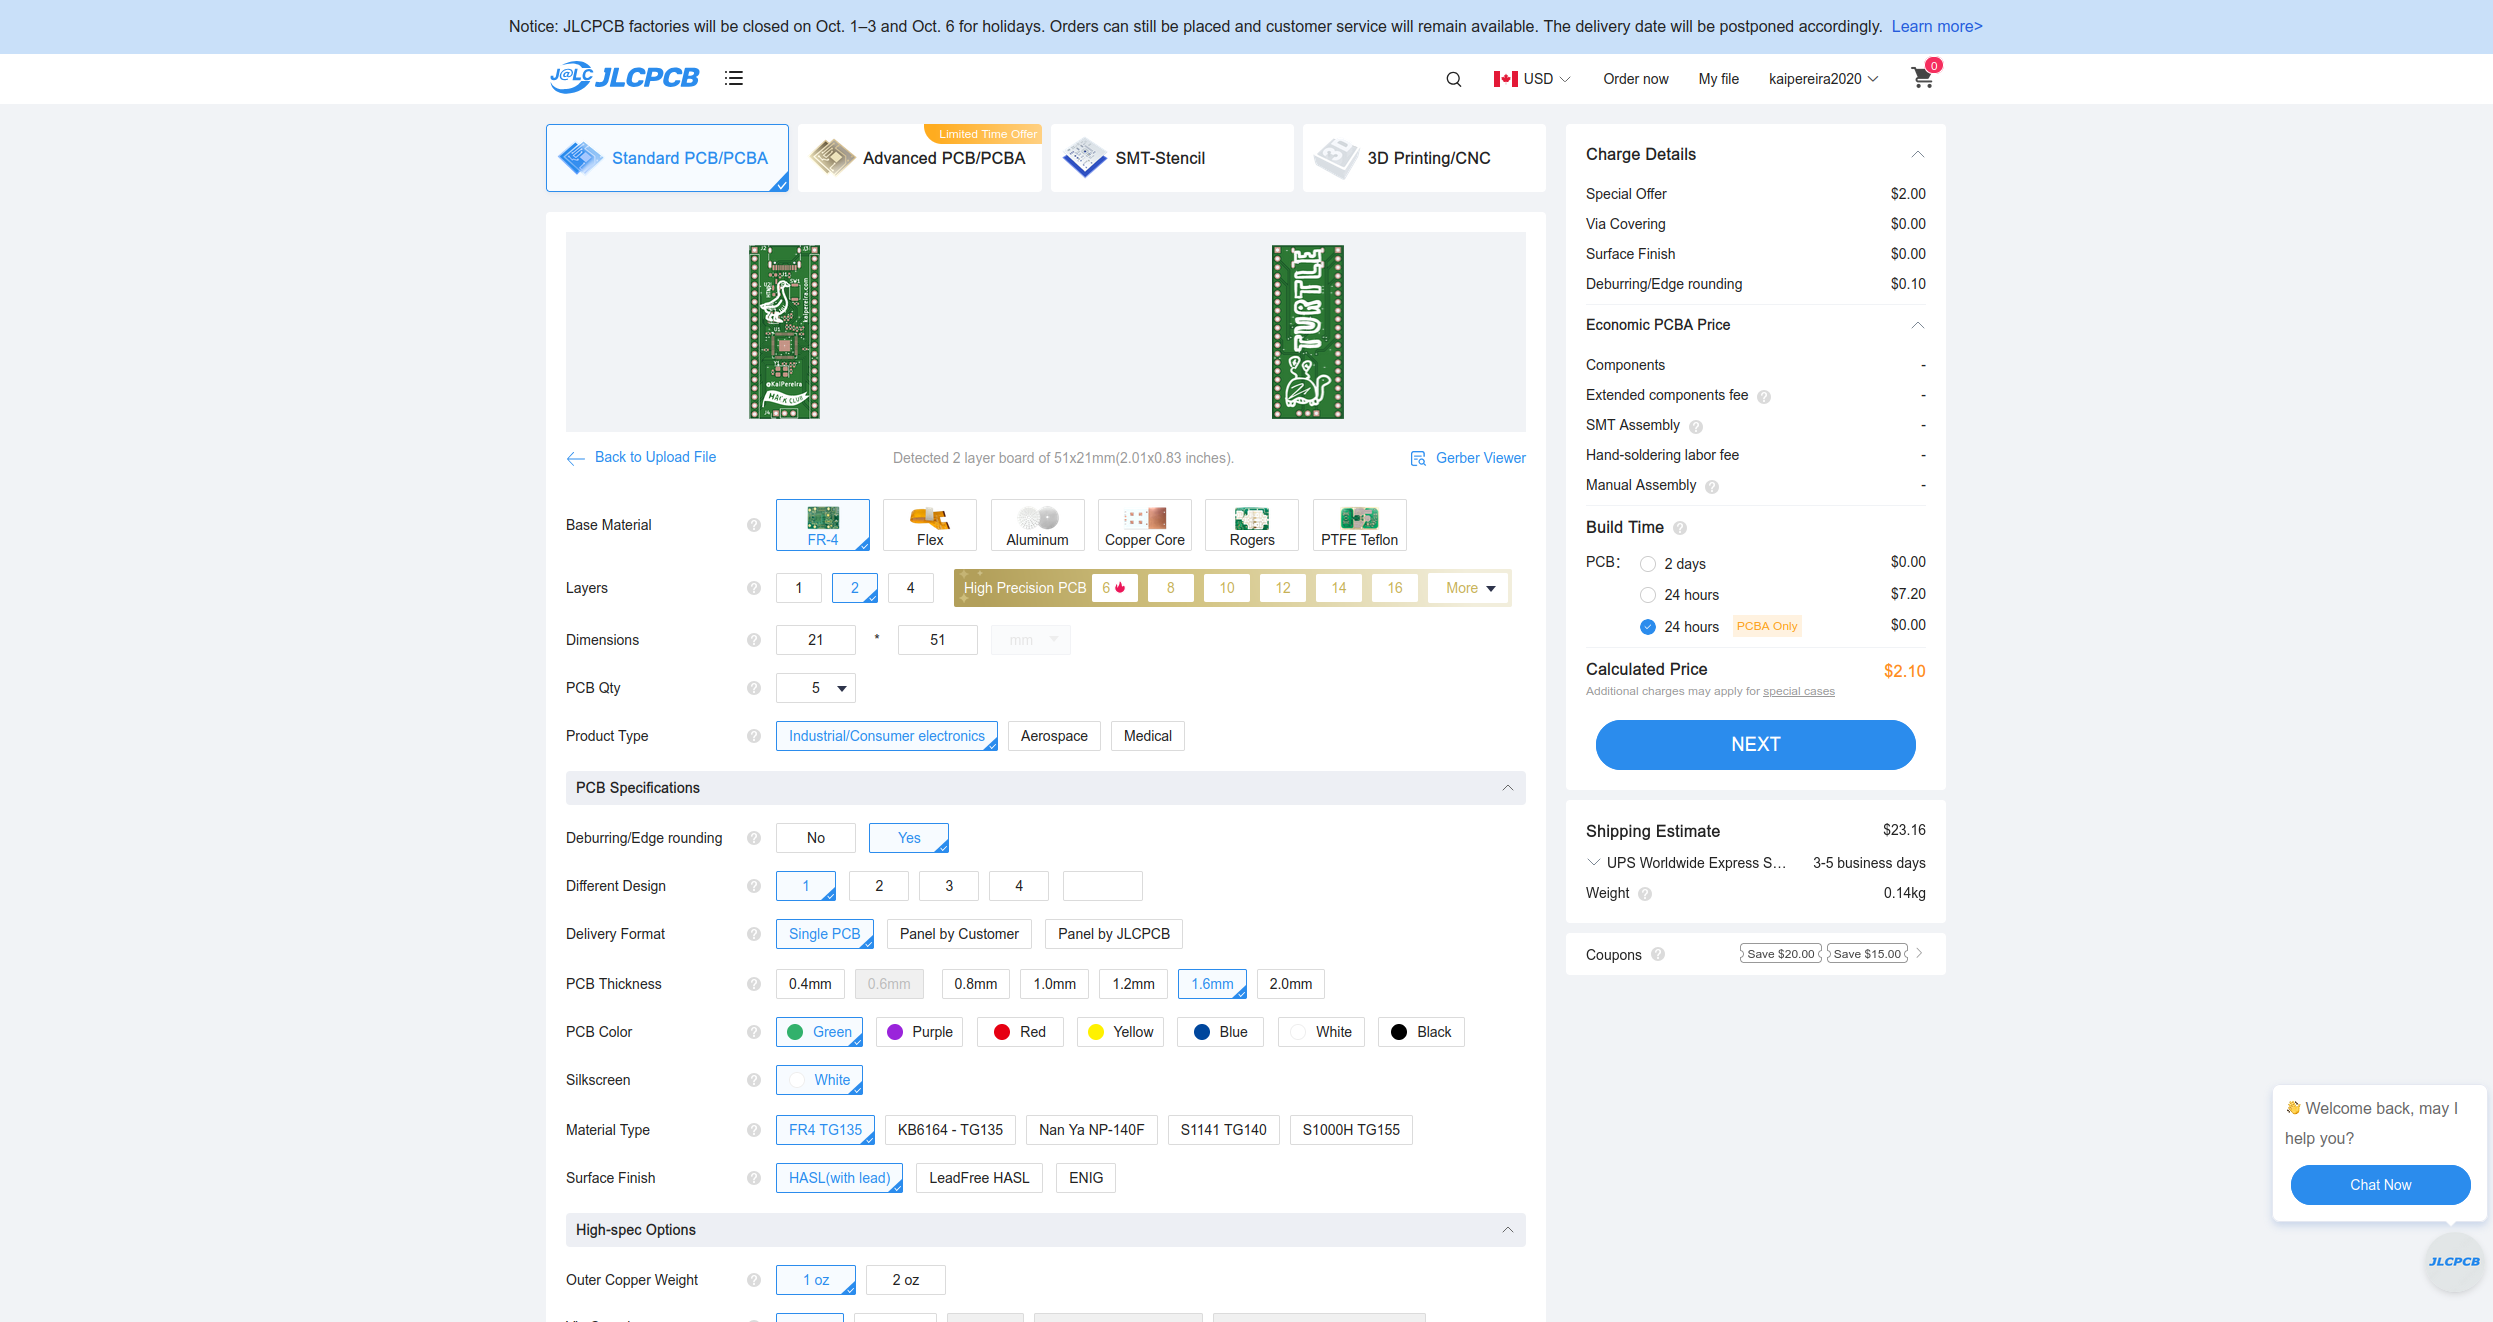
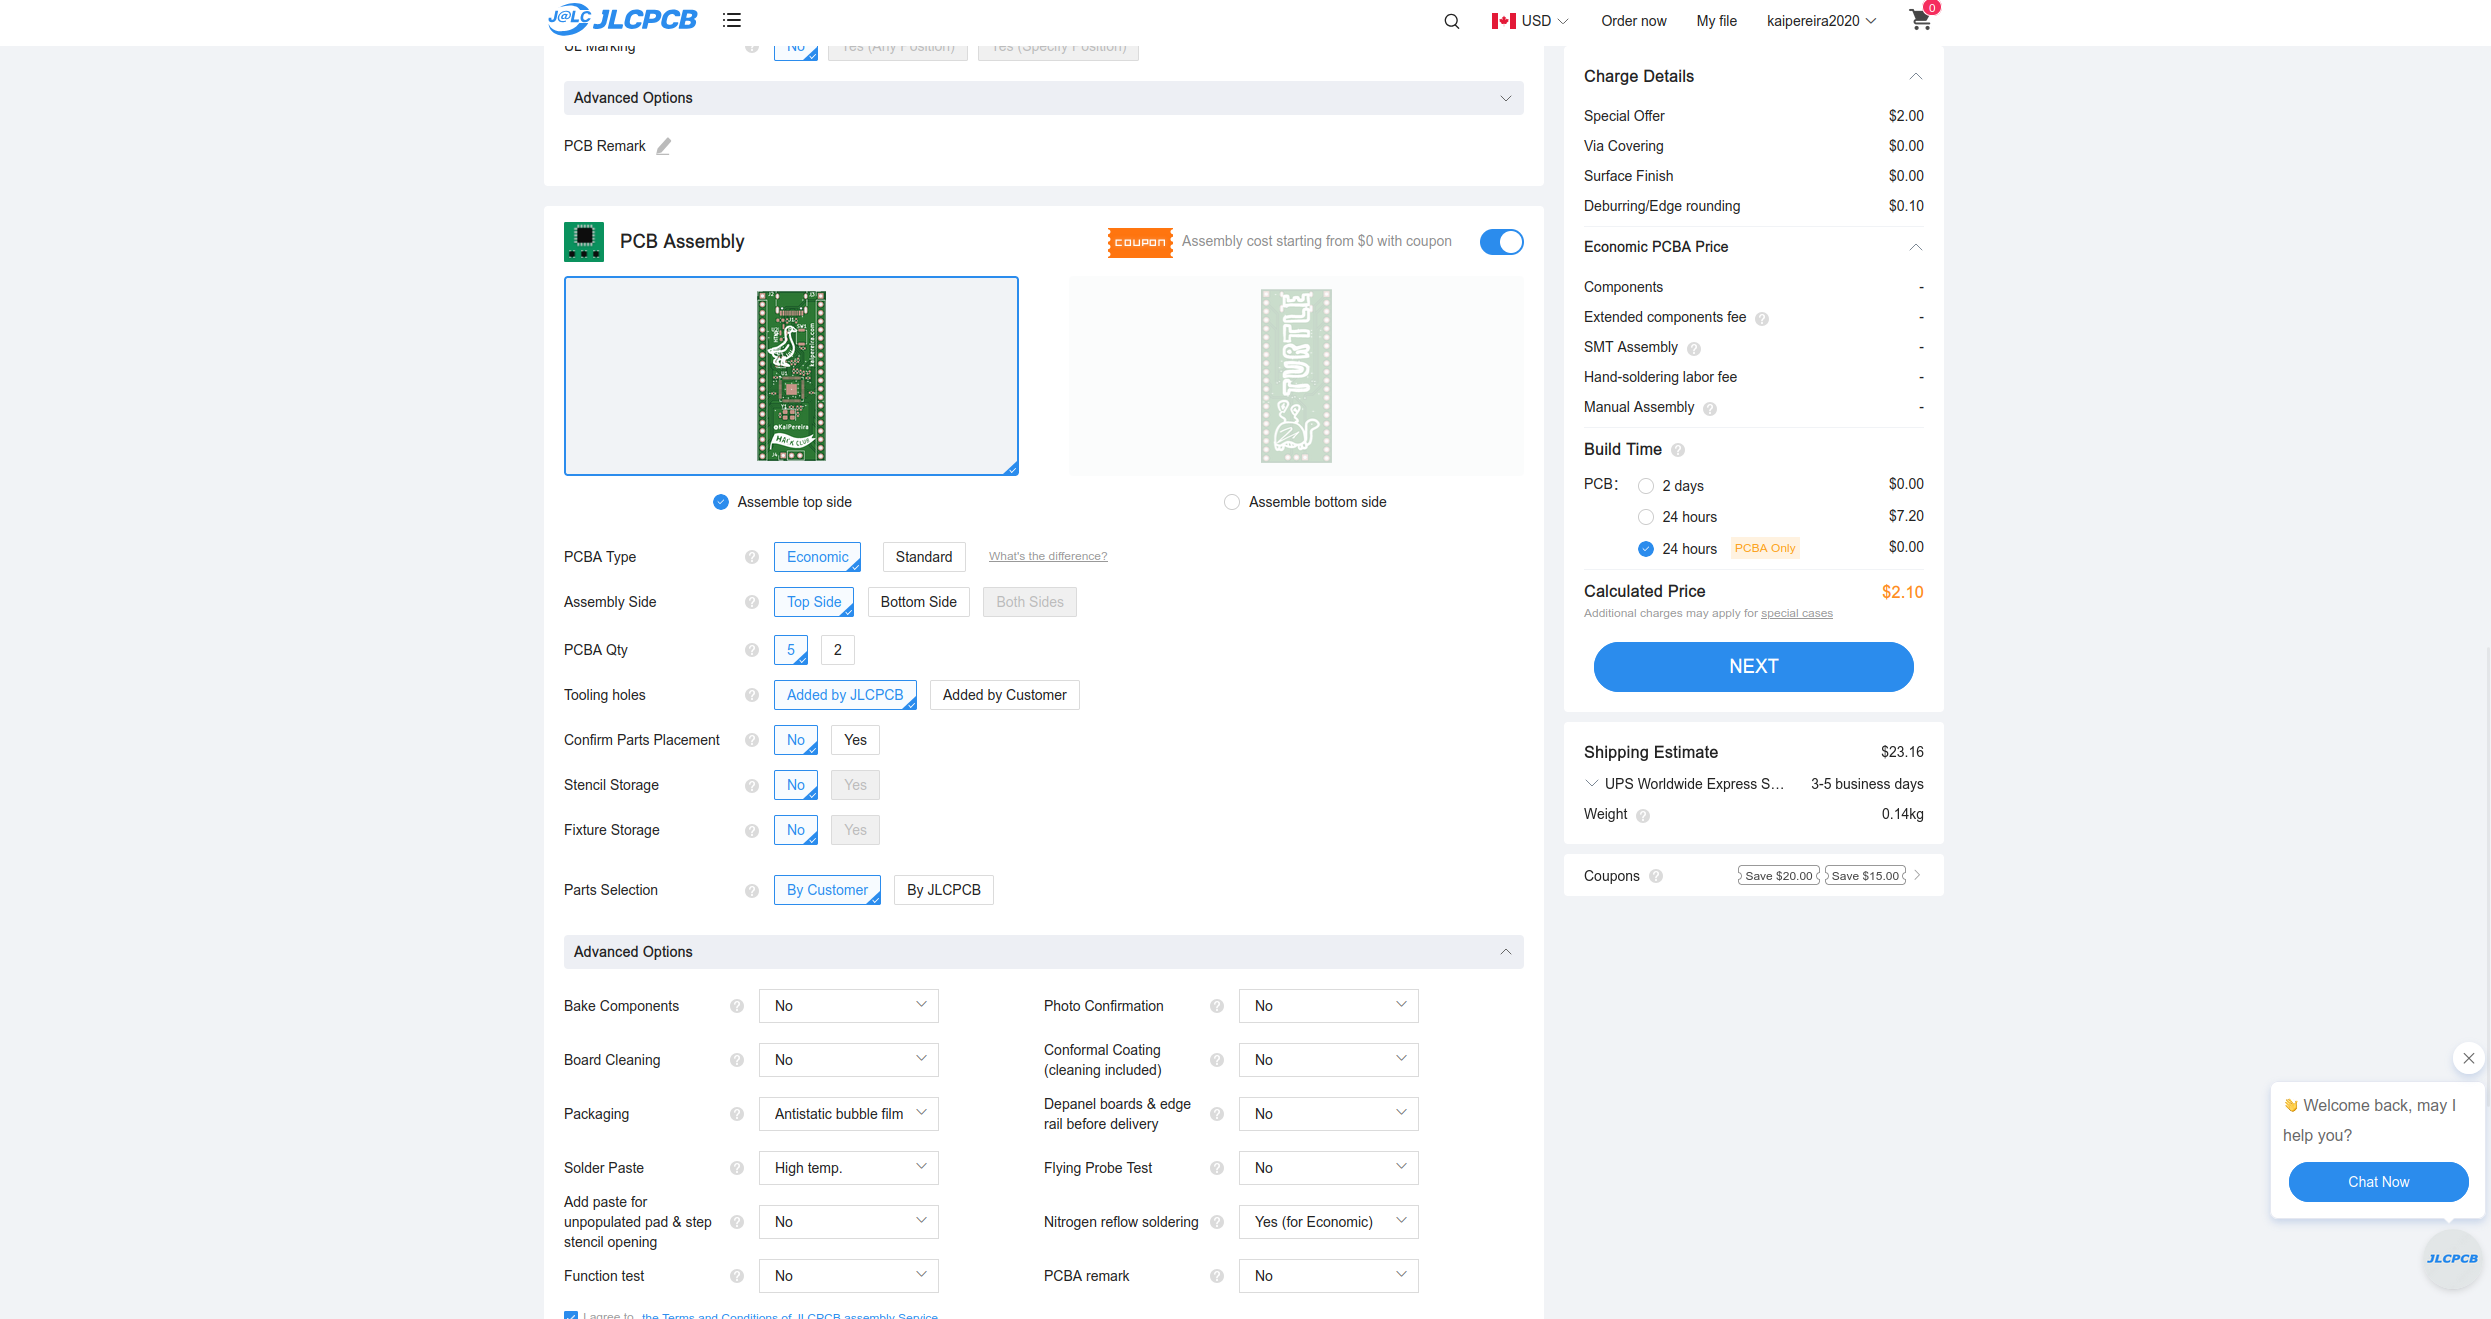
Head on over to JLCPCB and drag that zip folder into the quote section. You should see your PCB show up, and the only thing you're going to add onto your order is PCBA, this just makes sure that JLCPCB doesn't just give you the raw PCB, but also assembles it:
Now you don't actually need to use PCBA, if you want to save some money, you can just buy the components on LCSC or the JLCPCB parts manager (which will probably be cheaper), but you'll need to have all the tools to assemble SMD, but I'm going to include an SMD soldering part to this tutorial too if you want to do that
#Upload the BOM and CPL
-
Now tap next, and then add your BOM, and the CPL CSV you just created. If you have any errors when uploading this, check the internet, double check you modified the CPL/BOM properly, and worst case, tap the chat button on the website and ask the JLCPCB help desk.
-
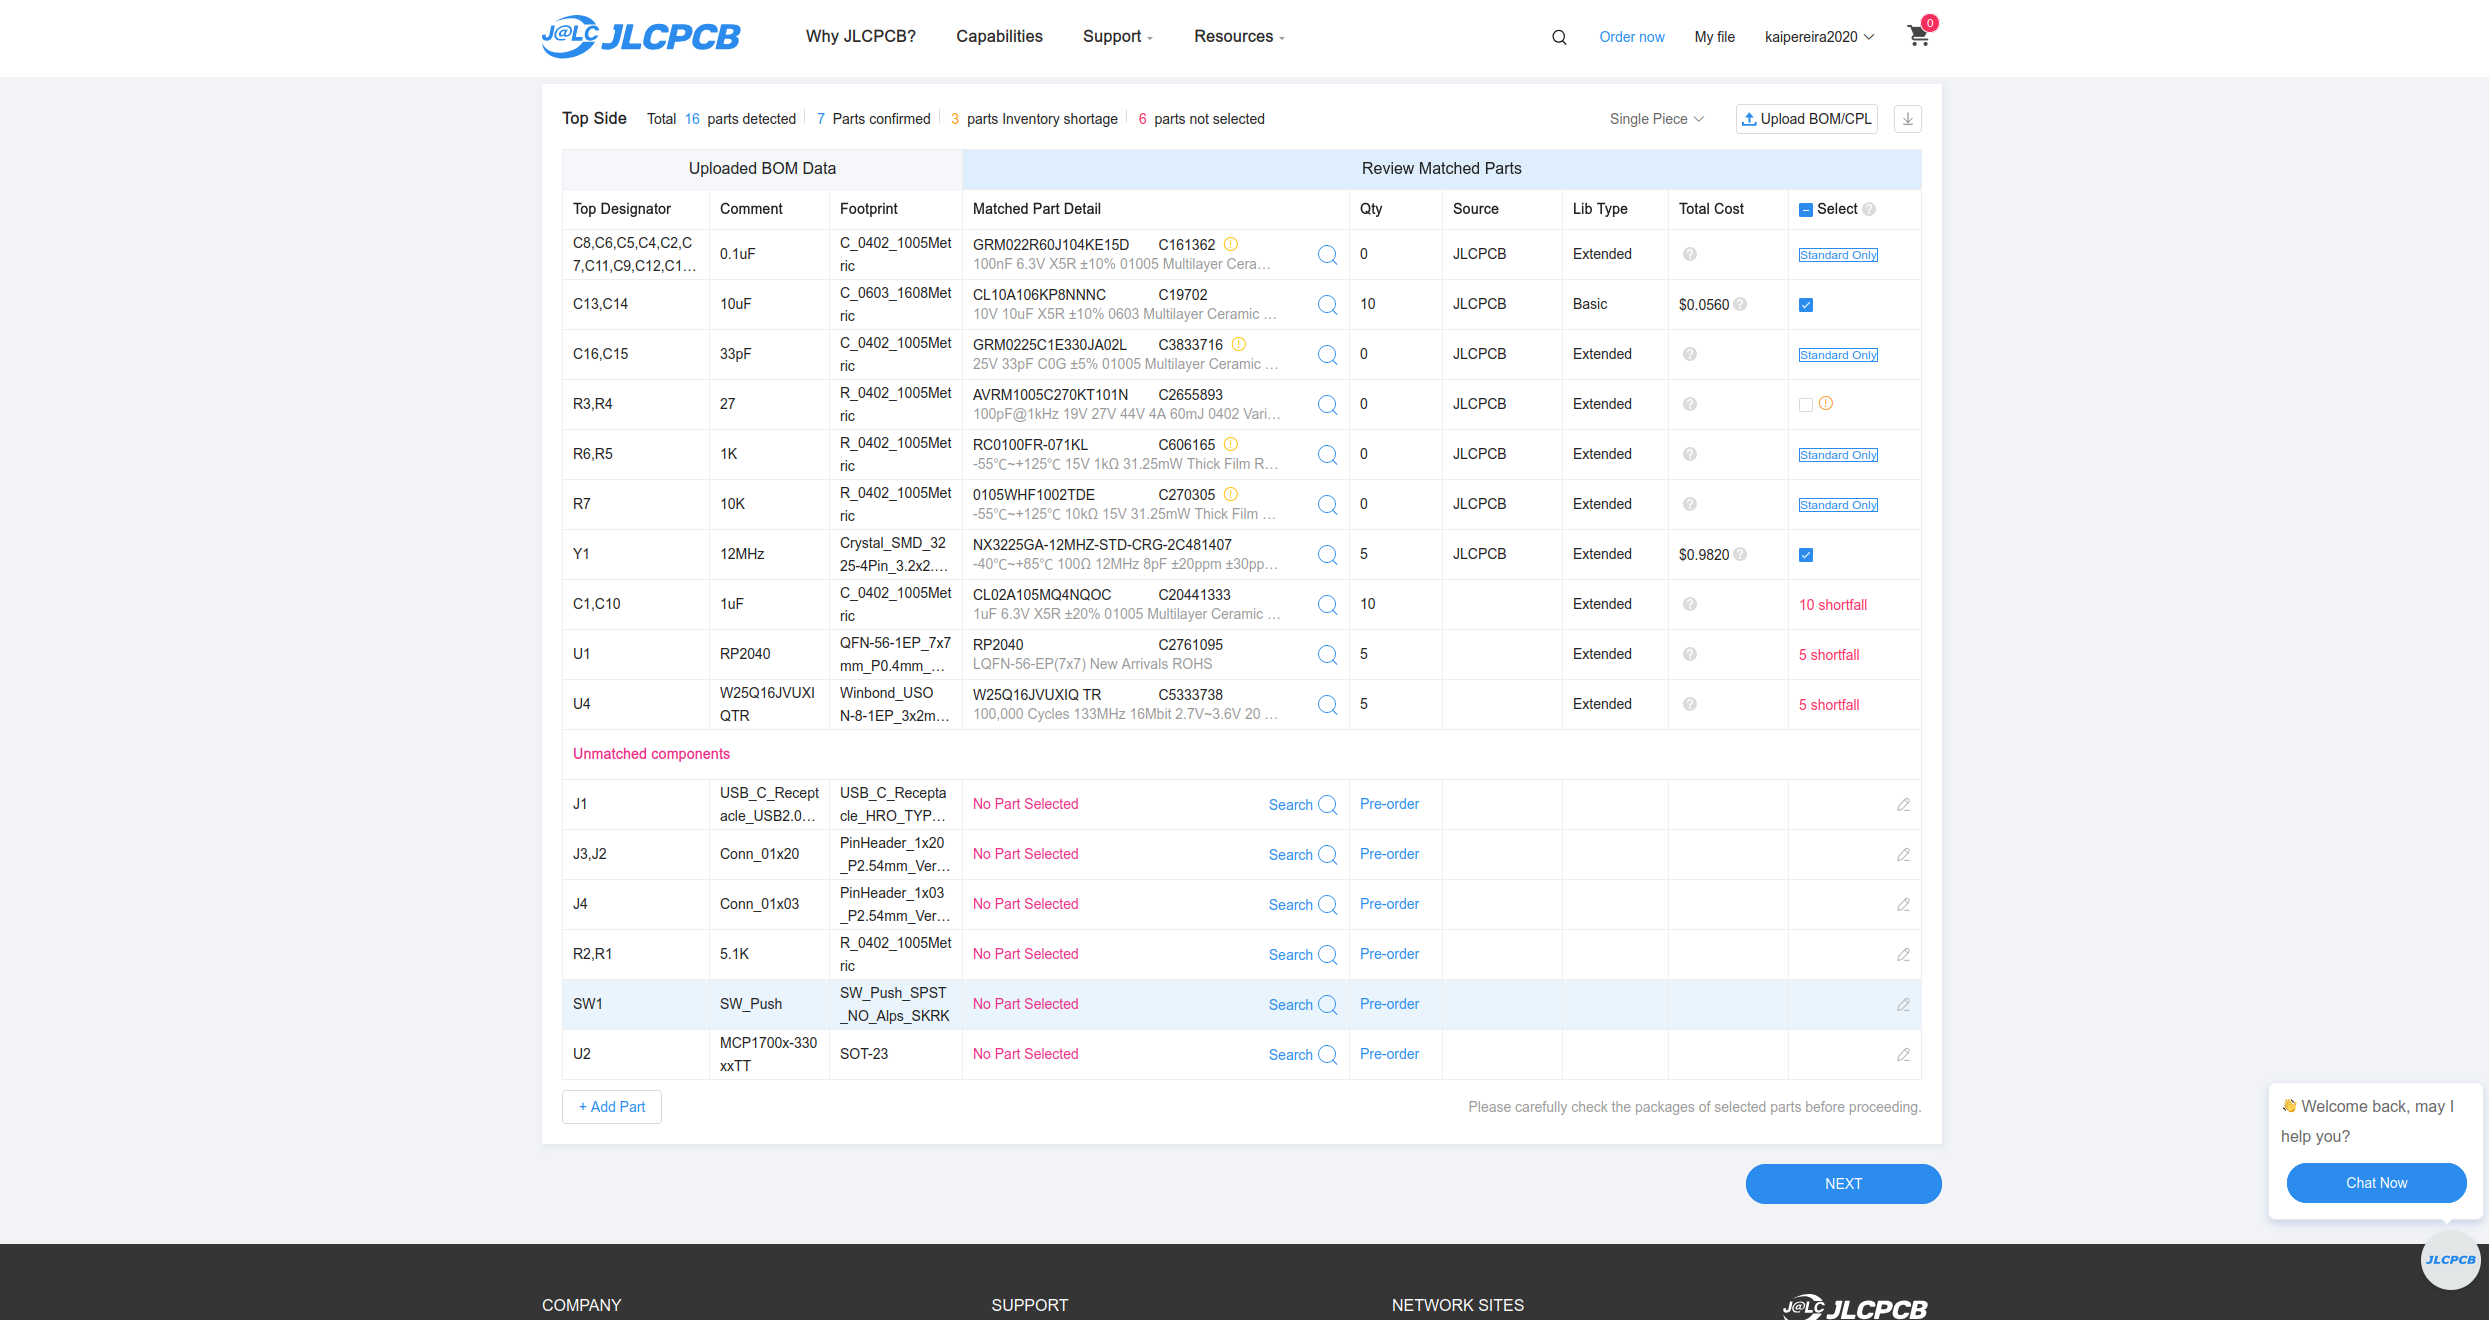
If you did everything properly though, you should be presented with the JLCPCB BOM page:
#Assign missing parts
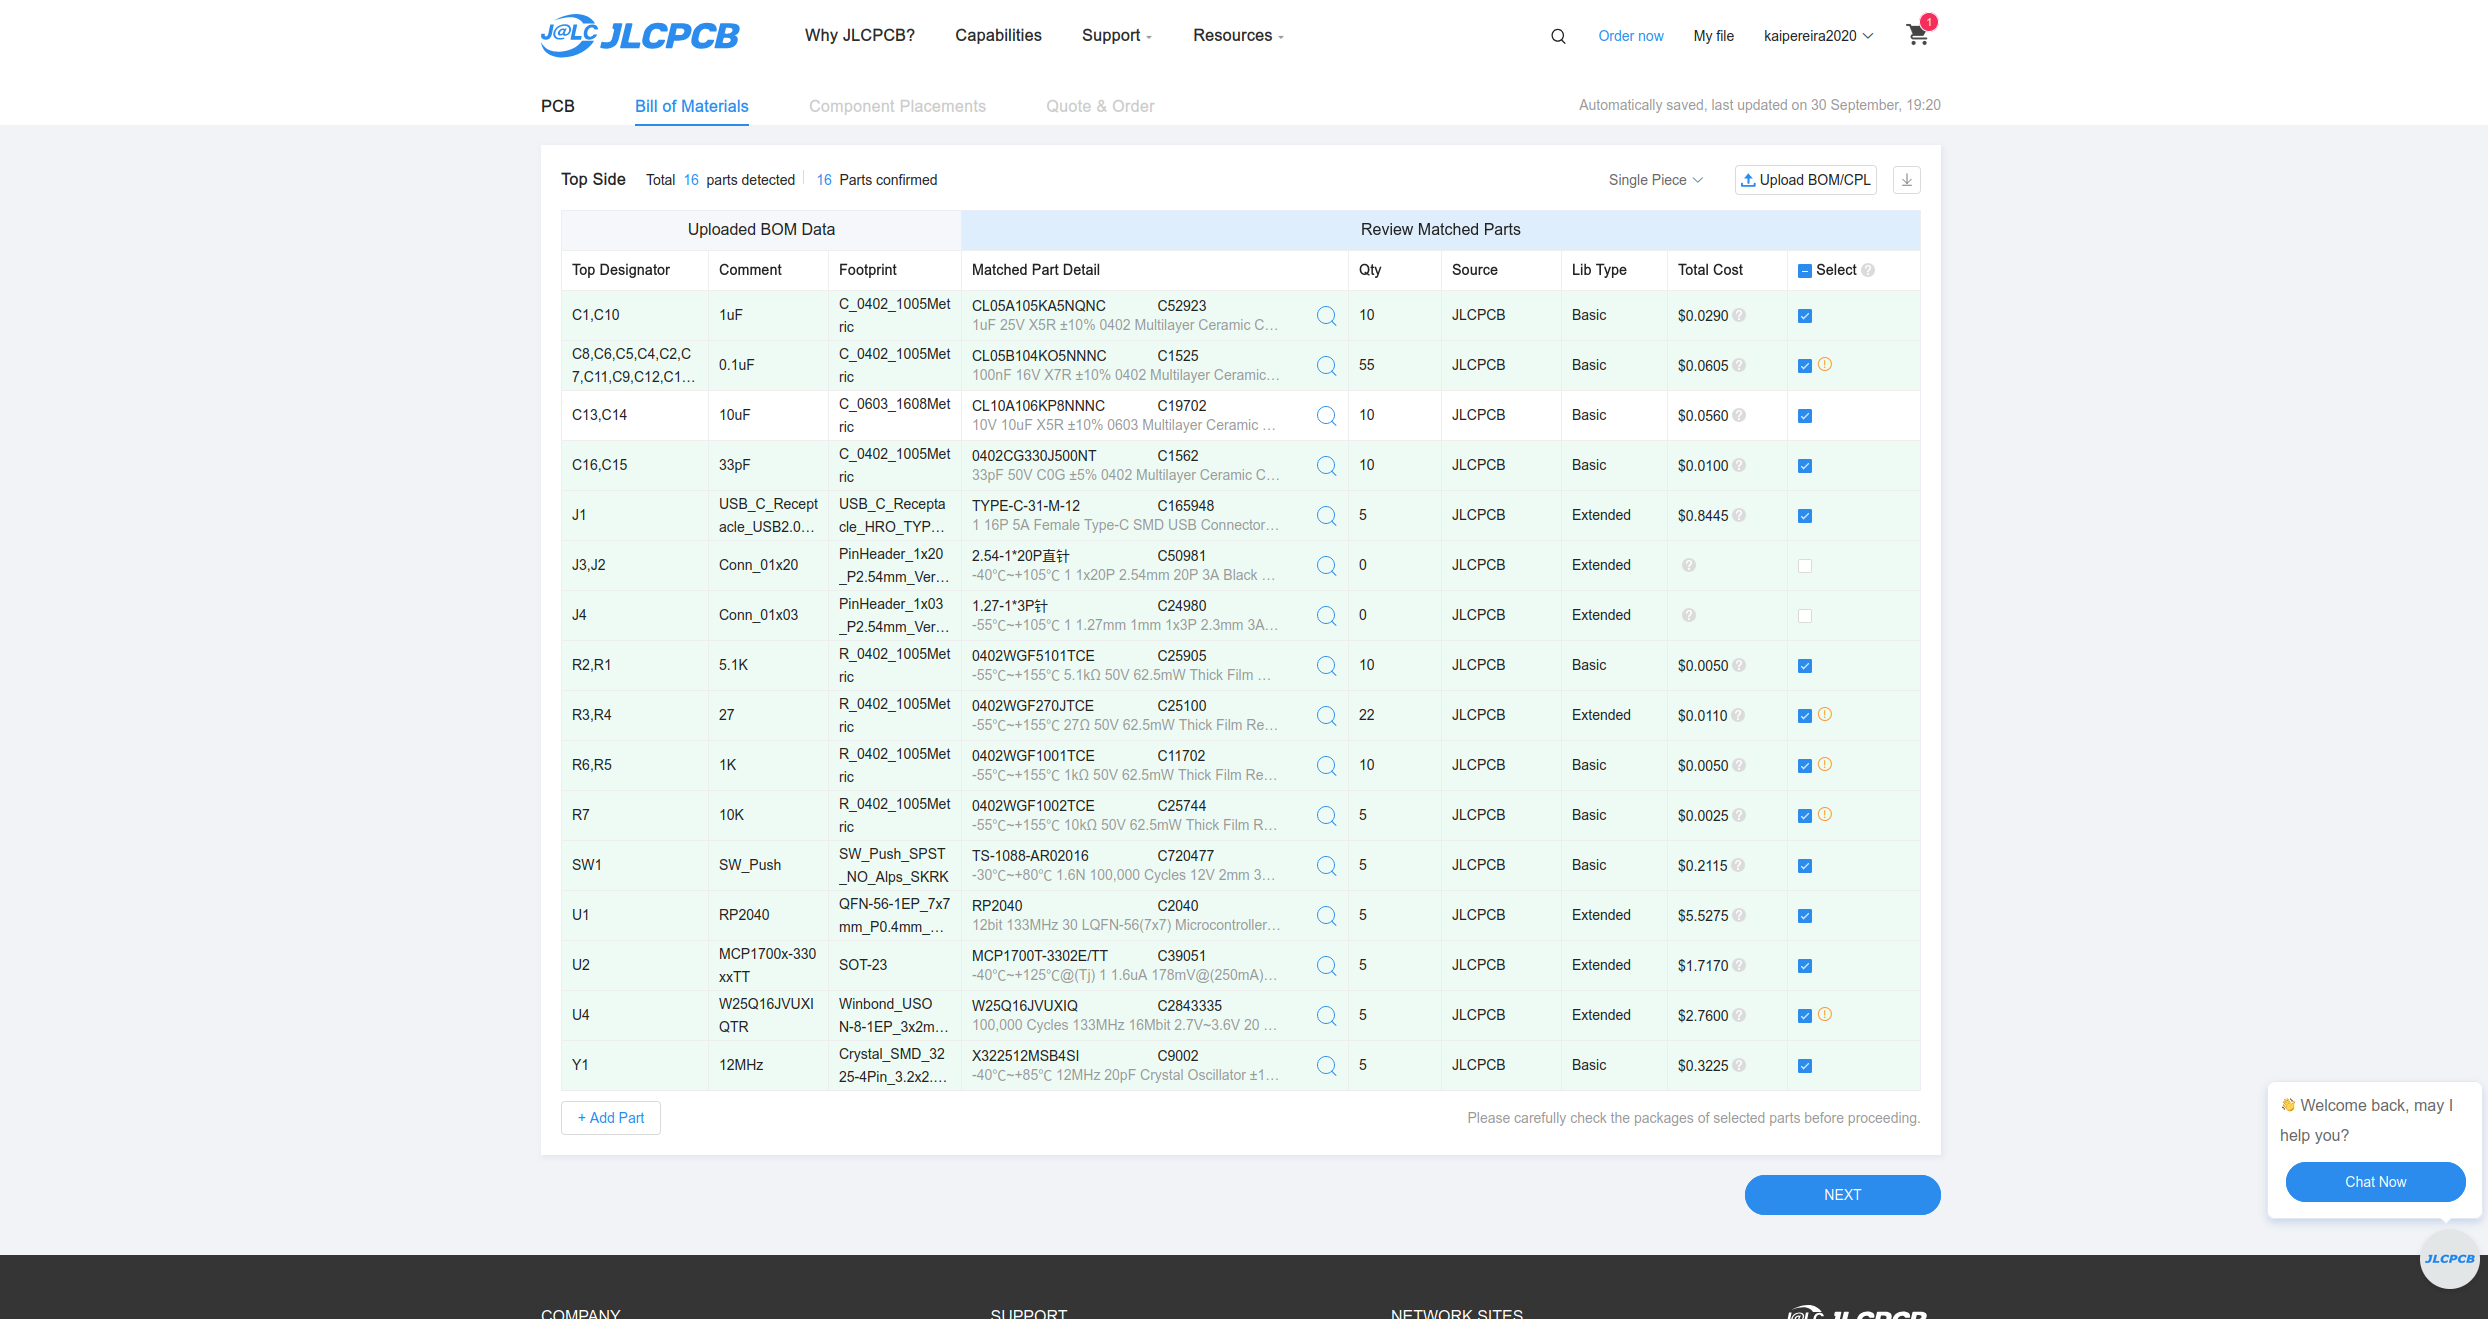
- Now we need to assign the parts that JLCPCB couldn't automatically find and the ones it got wrong. In most cases this is just a quick search and then tapping the first result, but make sure what you select is exactly what you actually want. The 27 ohm termination resistor is also probably going to be wrong, so you'll want to re-assigned this to a proper 27 ohm resistor.
This is what my final BOM looks like, feel free to copy mine (it'll be in my GitHub repository under /PRODUCTION/files too):
#Preview the assembled board
-
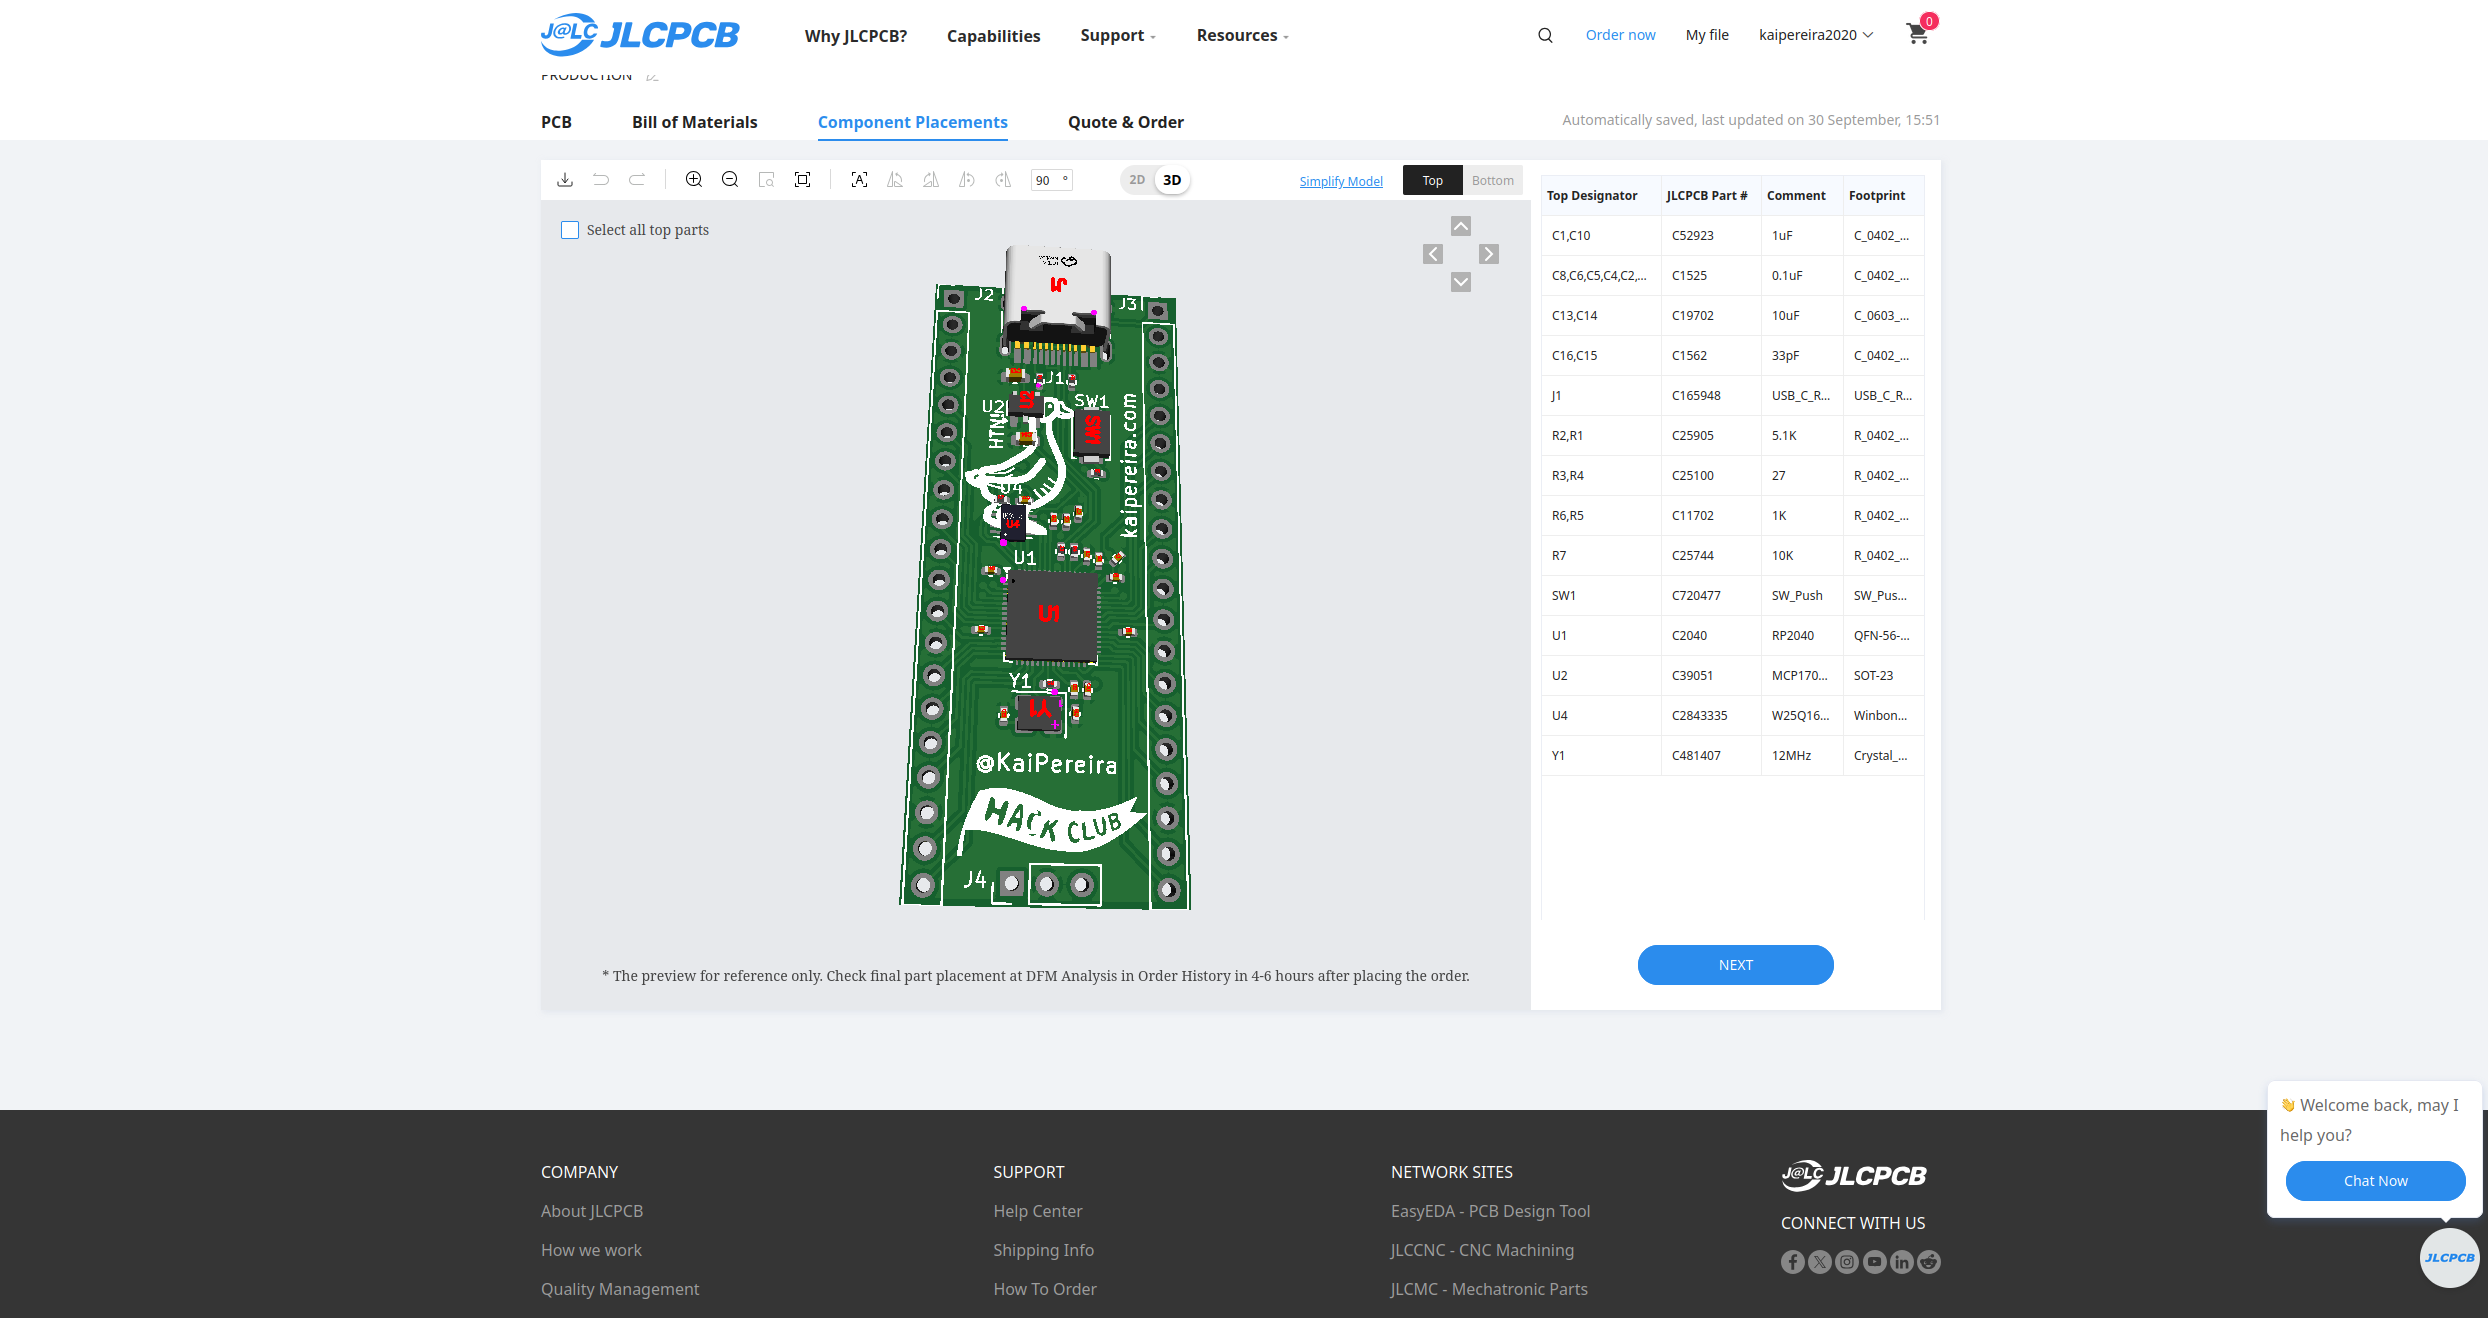
Continue on, and don't place the header pins (it'll prompt you), and then you'll see your assembled board show up:
#Nudge misplaced parts
-
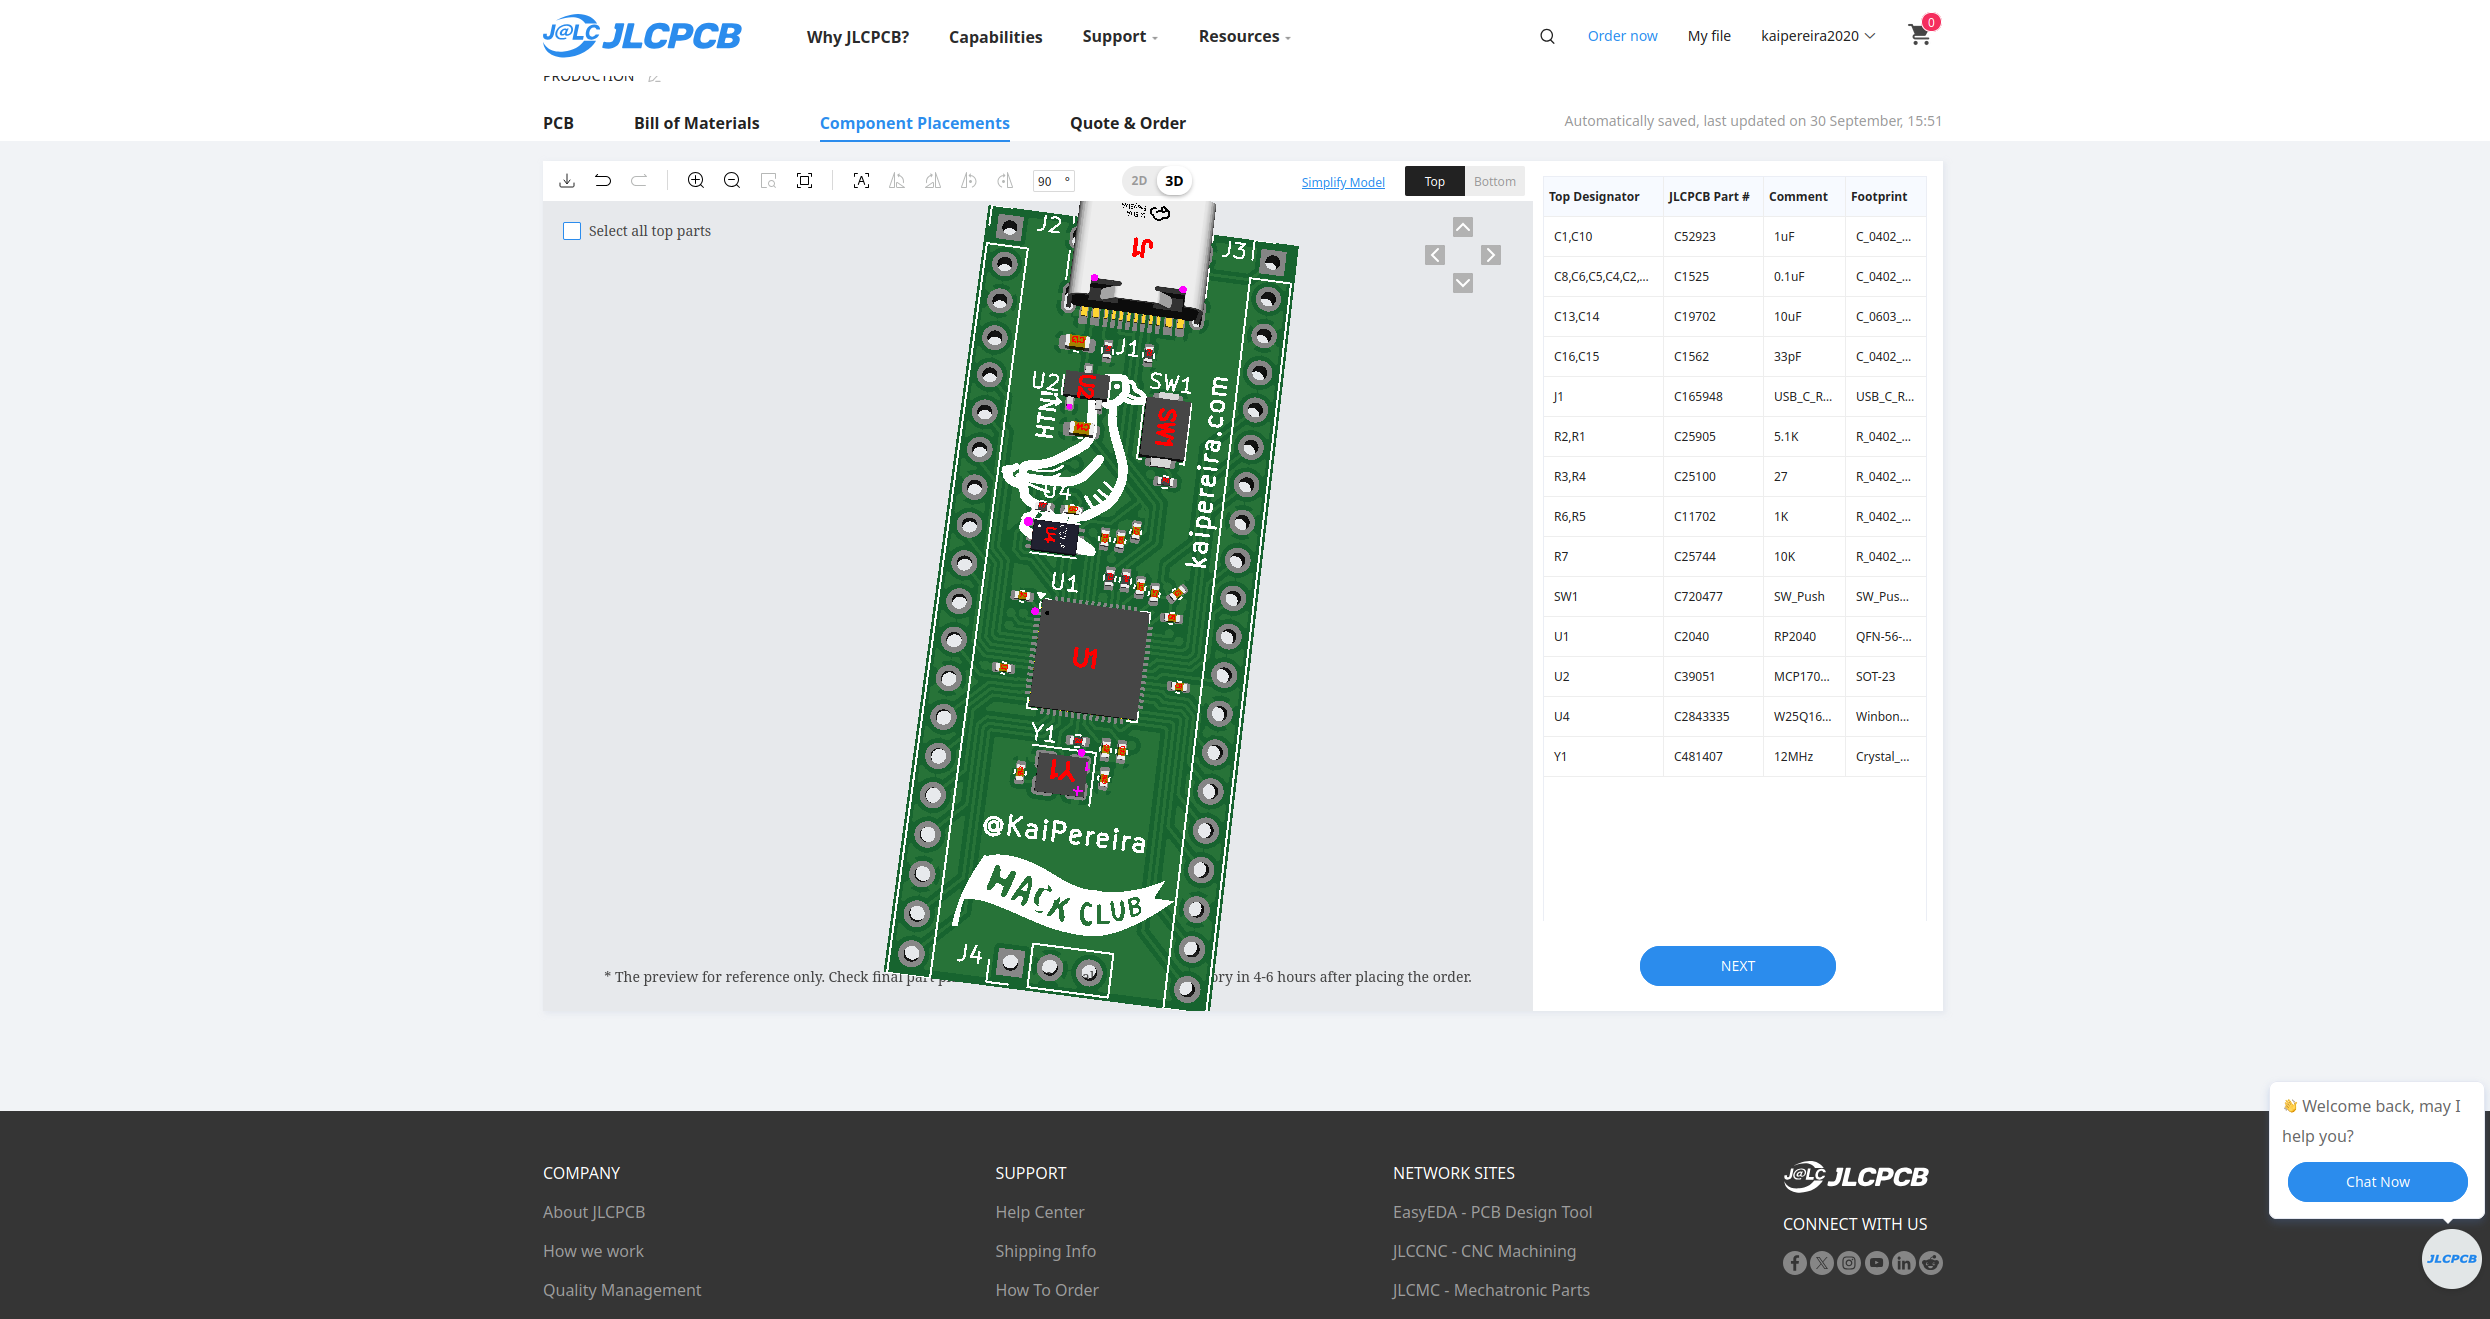
There's a couple components that aren't properly assembled on our boards so we need to move them manually! You'll need to move:
- The USB-C to fit within the holes nicely
- The LDO just needs to be turned a bit
- The flash memory needs to be rotated right so that the dot aligns with the triangle
-
And then everything else you should just double check, but it should be fine:
Now, tap next, and congratulations, you're done your PCB!!!!
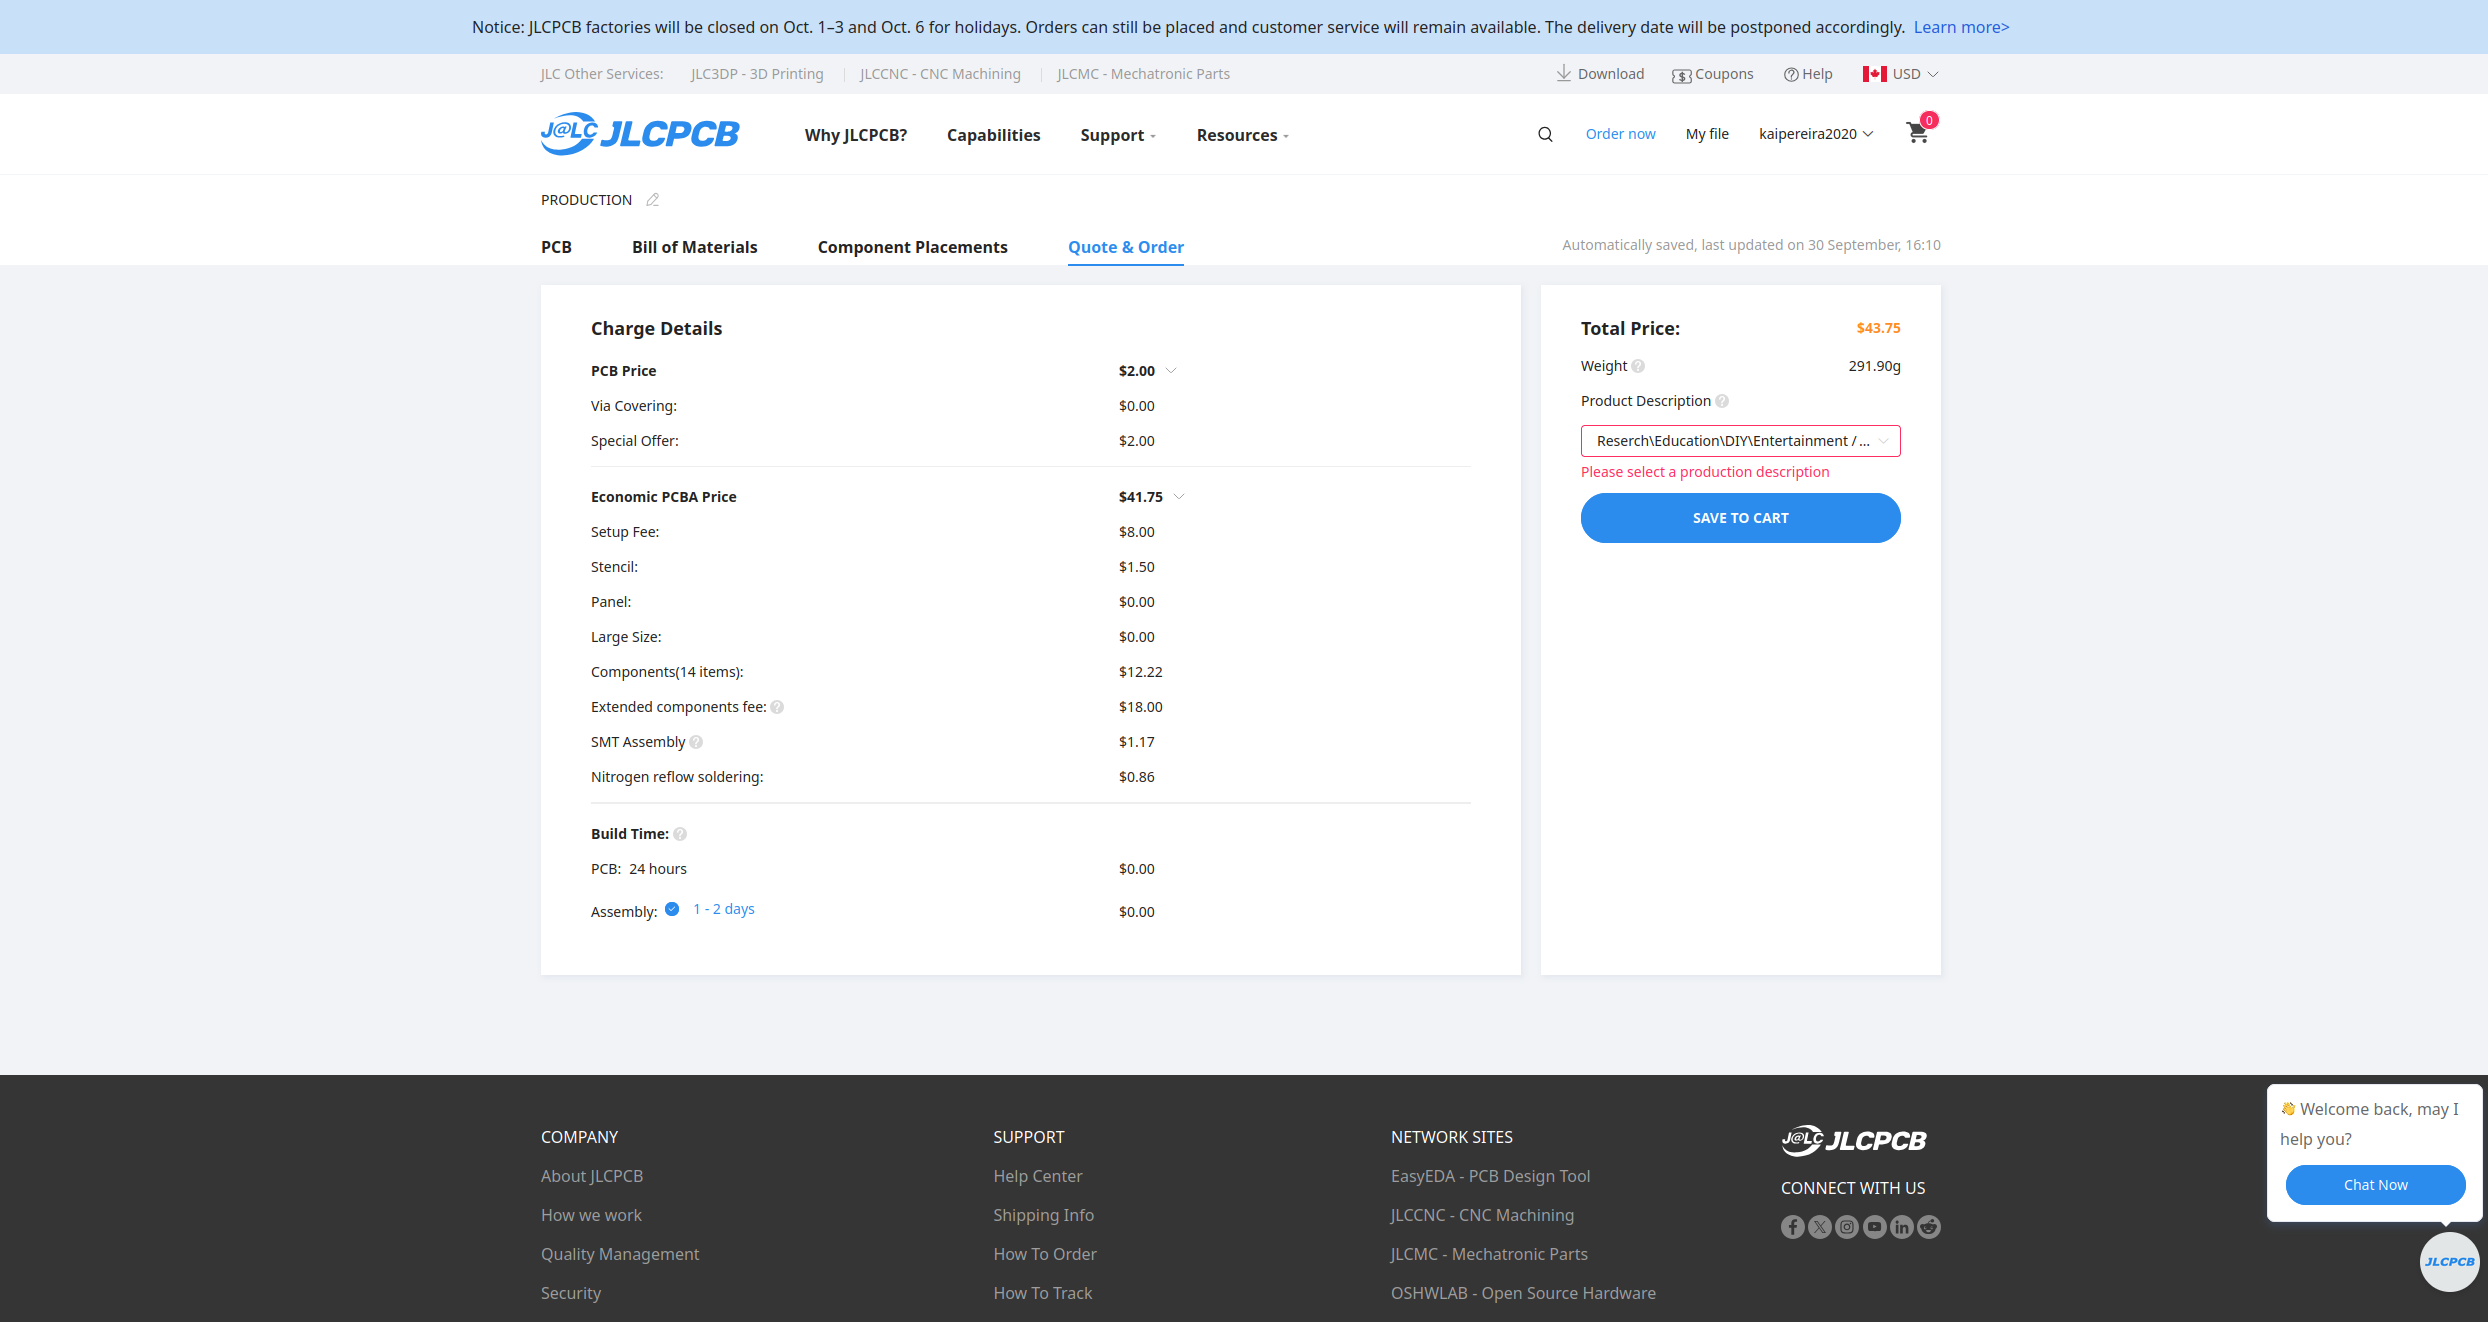
Congratulations on making your first PCB!! I know that this seemed pretty hard and complicated, but it gets so much easier with practice, so keep on making cool stuff!
Now try to challenge yourself in your next endeavor, and don't just make another devboard, try your hand at a motherboard, or a power controller, just something that challenges you and helps you learn!
Feel free to also modify this board you've created to include an LED matrix, motor drivers, literally whatever your heart desires.
I hope you learned alot, if you want to checkout some of the other stuff I've created, check out my projects on GitHub or my personal website kaipereira.com! Don't forget to post your finished projects in #ship and ping me (@KaiPereira) too!
Now if you want to stick around, we're going to go through assembling your PCB, if you didn't want to get JLC to do PCBA!